
Mossy Turtle

This turtle is carrying a lot of moss on his shell – didn’t realize this until I downloaded the image. Really funny looking but he does not seem to mind and the little fish seem to think it is cool! This image was taken during the brightest part of the day in a pond at Ormond Memorial Art Museum and Gardens in Ormond Beach, FL. Used a little split toning in Lightroom on this image, then in Photoshop added some sharpening using Topaz (see sidebar for website link) Detail 3. Filled a layer mask with black and painted the sharpening back in the mask just were I wanted it. Added a Brightness/Contrast Adjustment Layer with no changes but set to Soft Light at 45% layer opacity to brighten the image a little. (See my How to Use an Adjustment Layer to Localize Light and/or Dark in Image blog for more info on this.) I actually revised this image as I downloaded some really nice Nik Color Efex Pro presets from Flypaper Textures – ended using one of my own recipes but I really liked some of the results with the other presets. My preset used the Pro Contrast filter and Balance/Warmth filter to warm of the image just a little more. The last step was to add my SJ Thin Double Edge Frame to the image.
Let’s Hear It for the Graphophone

This image of a Columbia Grand Graphophone built in 1901 in France was taken at the Lightner Museum in St. Augustine, Florida. Really catches you eye when at the museum. Sears was selling it for $50.00 – it used 5-inch cylinder records and could also be used as a recorder. Apparently it came with different horns depending upon what you were doing. Just had fun playing with this image. In Lightroom the basic sliders were adjusted and some pretty crazy spit toning applied where a really pink tone was created. In Photoshop applied Topaz (see sidebar for website link) ReStyle’s Cream and Plum preset (only changes were to Black Level -0.22, Midtones 0.11, and White Level -0.73; and Detail Structure 0.44 and Sharpness 0.75). A Levels Adjustment Layer was added and all the tabs were adjusted (Black 3/Midtone 0.70/White 196) which created quite a bit of clipping in the image. It seemed to help with the reflections of glass. A little clean up and that was it. I love working on the old items – the materials and color are so nice……Digital Lady Syd
Feeling Peachy!

This image was taken at the Ormond Memorial Art Museum and Gardens in Ormond Beach, Florida. Very small park-like area with lots of little spots to take pictures – one of my favorite local places to practice a little photography. This is a 3-shot HDR tone-mapped image using Photomatix Pro’s Merge to 32 bit HDR so I could use the sliders in Lightroom to process the resulting TIFF file. Topaz (see sidebar for website link) Black & White Effects and Alien Skin’s Snap Art 3 were applied. An overlay I had created from Kim Klassen’s Cloth & Paper Touch 1 texture was placed on top and changed to a tangerine color. The text uses my favorite type text, Batik Regular. It was really just playing with the things I already had. I just love the warm tones in the image……Digital Lady Syd
Digital Lady Syd Related Blogs:
How to Create an Overlay Out of a Texture
Keeping Time

Just loved how this image turned out. I liked the fact that the dining room was light and bright and slightly out-of-focus and the clock and plant looked pretty nice when put together. The little philodendron was rooted from a clipping of a plant I have had 20 years – amazing! The original image was processed in Lightroom using just the Basic Sliders and Dave Delnea’s Backlight Vertical Right preset. Once opened in Photoshop Topaz (see sidebar for website link) Detail 3’s Shadow Relief III preset was applied to sharpen up the image little. Nik’s Analog Efex Pro‘s plug-in was applied – it is turning into one of my very favorite plug-ins! Basic Adjustments, Bokeh, Light Leaks, Dirt & Scratches, Lens Vignette, Film Type, Frames, and Level & Curves tabs were used. I have created a favorite look preset and just keep modifying it – I think that is the easiest way to use this plug-in. A Curves Adjustment Layer was added to increase contrast and that was it. This is just too much fun to do!…..Digital Lady Syd
Digital Lady Syd Related Blogs:
Digital Lady Syd Reviews Nik Analog Efex Pro
Using Nik’s Analog Efex Pro on a Historic Statue
Using Nik’s Analog Efex Pro on a Historic Statue
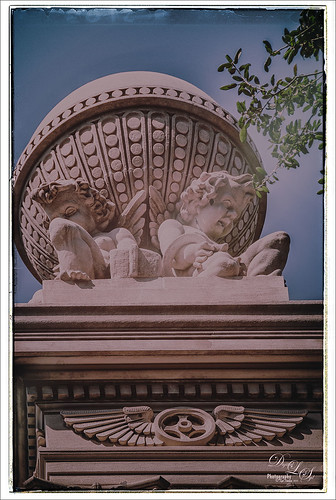
I really like what Nik’s Analog Efex Pro plug-in does for statues and historic images. At first I did not like this image of the Gordon Monument in Wright Square in Savannah, but since it had that historic look to it, it seemed like a great fit with this new plug-in. Sure enough, it really created a beautiful image and has a feel to it that suits the image. I believe I used the Vintage Camera 4 preset as a starting point, but changed everything up so it is really hard to tell. I always start with the Basic Adjustments tab. Light Leaks was changed (third down, second over) and the Strength set to 67% – the On Image Control was moved towards the bottom. In Lens Vignette the control was set on the figures and the size and amount adjusted. The Film Type was Subtle (second down, first one) and the fading was increased.I changed the Frame – really liked this one in Whites (third row, second over). Back in Photoshop I did add a Curves Adjustment Layer just to pop the colors a little more. I find it a rather charming picture! See my Fun Photoshop Blog Digital Lady Syd Reviews Nik Analog Efex Pro for more information on this new plug-in from Nik. Personally, I love it!…..Digital Lady Syd
Happy Veterans Day!

Happy Veterans Day to all who served! While visiting Savannah, Georgia, recently, I was impressed by how patriotic the city is – US flags were everywhere. I found this image to be quite pretty on a beautiful Sunday morning! In Lightroom the NAPP preset called Hang Ten (the preset is referenced in Scott Kelby’s The Adobe Photoshop Lightroom 5 Book for Digital Photographers) and Dave Delnea’s Backlight 002 Vertical preset (which creates the beautiful lighting effect) were applied along with the basic sliders. This image used Topaz (see right side for website link) Simplify and Alien Skin’s Snap Art 3 in Photoshop. A couple Curves Adjustment Layers were used, one for targeting the flag and the other creating a light vignette effect…..Digital Lady Syd
A Day in the Sun!

I love how this image turned out! This is from a wonderful day in Savannah, Georgia, at the Gulfstream Family Day in October. I wanted to go up in that Ferris Wheel, but did not get a chance to. I used a Lightroom preset on this image called Hang Ten from NAPP (the preset is referenced in Scott Kelby’s The Adobe Photoshop Lightroom 5 Book for Digital Photographers) – gives a real soft vintage feel and then Backlight Horizontal Left from Dave Delnea’s presets, some of my very favorites! In Photoshop two of my favorite plug-ins were used: Alien Skin’s Snap Art 3 was applied using just the Factory Default and adding three layers to bring in some more details; next Topaz (see sidebar for website link) ReStyle was applied using Silver and Ivory Cloak preset and then changing: Texture Strength -100; Temperature 0.14, Saturation 0.05, Black Level 0.38, Midtones 0.06, White Level 0.19, and Structure 0.27. A Curves Adjustment Layer and Levels Adjustment Layer were added to get the contrast just right. That was it – very simple. It really has that old County Fair feel to it!…..Digital Lady Syd
A Little Painting Action

Here is another example of Jack Davis’s Mixer Painting SetUp-BETA action. Just a lot of fun to do. It is not as clear a result as with Alien Skin’s Snap Art 3, but there is more individual interpretation when creating the painterly look. Check out my Can You Get a Painting Look With a Photoshop Action? Jack Davis Can! blog to learn how to do each of the steps and for info on how to download the action. What made this image look nice was adding Painted Textures Parisian Pool to the image just above Pattern Fill 1. In the Layer Style dialog, the This Layer black tab was split and set to 108/155 (ALT+click on tab and drag to split) and the white tab set to 139/209. I would encourage to download this action and give it a go!…..Digital Lady Syd


