Happy Halloween!

Well, Happy Halloween from Digital Lady Syd! Got a little carried away with this one but it was so much fun to do! These beautiful Wizard of Oz dolls were in a window of a gift shop in Savannah, Georgia. Unfortunately there were huge reflections coming from everywhere, so it would not process cleanly – but it was not a total loss for some crazy Halloween effects! I was actually pretty upset as I had completed this image and Photoshop CC crashed and did not save my image which I had been working a couple of hours – first time that has happened and made me nervous to do it over, but here it is, all 25 layers. I will just give you a quick recap. Lots of cloning in Photoshop to get rid of a lot of the reflection. Then the image was taken into Alien Skin Snap Art 3 just to give the colors a smoother feel. Back in Photoshop many layers were used to add Halloween object using brushes from : Obsidian Dawn and her free Cobwebs and her Halloween Vector brushes, Anodyne Halloween Skull and Pumpkin Face brushes, and my favorite Cat brush from Altergromit. Different layer styles and opacities were added to get the final grouping. The bat layer was set to Exclusion blend mode to get the weird ghost effect. I love the Halloween Spider font! Overall it was pretty easy to do. Got to love these holiday images!…..Digital Lady Syd
A Beautiful Morning, I Think I’ll Go Outside for A While…..
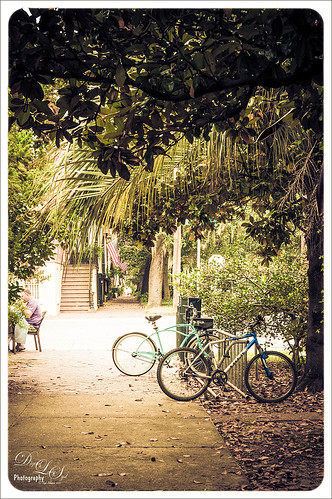
This image was totally processed in Lightroom (could have been done completely in ACR) and it just reminded me of how this day really felt. It was a beautiful Sunday morning in Savannah, Georgia, USA, and could not have been more perfect! What a great city to spend a day in! This image actually looked great as a black and white, but I still liked the fall tones better in this image. Pretty much did a few basic tab slider changes and then found Jack Davis’ Wow-Antique 01 Lightroom preset. (Go to Jack Davis Wow Facebook page and Like his page to get 46 Lightroom presets in his Freebies section – it includes this beautiful preset.) Then the Aqua Luminance and Saturation was boosted to give a little more color into the bikes. To get the blown out look on the street, I used the Tone Curve TAT tool (located in upper left corner of panel) and dragged it into the center of the image until the slight High Key look was achieved. Then saved as a JPG in Lightroom to post. So simple but so lovely!…..Digital Lady Syd
More Butterflies Enjoying the World
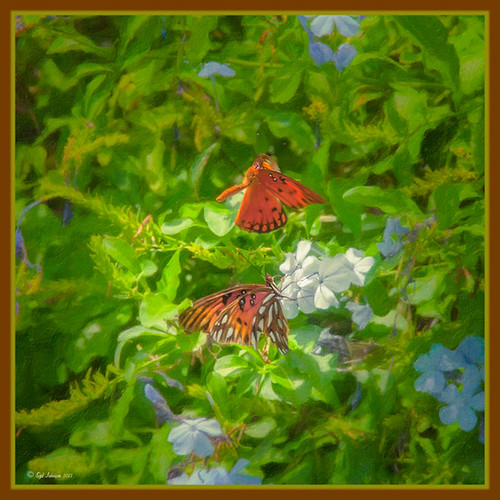
Can’t get over how many wonderful butterfly shots I got this year. I think they really liked out yard since we had so many blooming plants. These mating monarchs were dancing around my plumbago bushes in the back yard. They were moving so fast it was hard to get a shot where they were both in focus, but this one was pretty good. I actually had my ISO set to 800 in full light to get a quick enough shutter speed! In Lightroom I did just basic sliders and sharpened the butterflies using an Adjustment Brush on just them. Then I applied the Retro Vintage preset I created from Allen Mowery’s free preset (for download link and my preset settings, check out my Fun Photoshop Blog How To Add a Little Retro To Your Shots). The Radial Filter was used to created to slightly darken and desaturate the edges. In Photoshop Alien Skin’s Snap Art 3 was opened and the Impasto Portrait (soft) preset was selected. Three layers were used – one to sharpen the butterflies a little, one for the white flower, and one for the leaves around the butterflies. Back in Photoshop a layer mask was added and a little more of the detail of the butterflies was painted back. The frame is my SJ Double Edge Frame layer style. The colors turned out so beautiful!…..Digital Lady Syd
Where Am I?
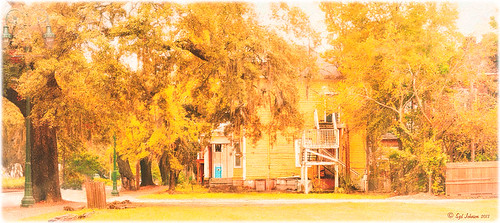
Had the opportunity to visit the beautiful historic city of Savannah in Georgia, USA. This image of an older house is enhanced, but I just felt like adding some yellow and fall colors to a rather overwhelmingly green and boring image in the original. Everything but the kitchen sink went into this image (it felt that way) but finally I got the look I really liked. So here were the steps in a nutshell:
1. Applied Richard Hale’s Sunnyday preset in Lightroom (see A Summery Lightroom Preset for more info on creating it and free download link).
2. Opened Topaz (see sidebar for website link) Clarity’s Landscape Beach Shore I preset and used as is.
3. Back in Photoshop the ACR filter was opened and just the HSL sliders adjusted to get more of a yellow feel.
4. Used Color Range (How To Use the Color Range Command with CS4 Through CC 14.1 blog) to select the sky and added a small amount of aqua color to it.
5. Added Alien Skin’s Snap Art 3.0 using just the Factory Default setting and Photorealism slider set to 100%.
6. Cropped to straighten a little more.
7. Added Levels to enhance the contrast a little.
It took a long time to post-process this image and get it tweaked the way I liked it, but I love the final product. Lots of fun here!…..Digital Lady Syd
Just a Little Flowing Water
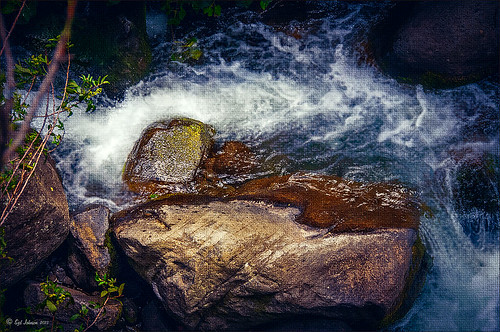
This is not a traditional image for me – I usually do not shoot flowing water, especially in close-ups, but with a little Photoshop help, I got a really nice look. The rock was in a stream at Iao Valley in Maui, Hawaii. Very little was done to this image – just basic changes in Lightroom which included using an Adjustment Brush set to 100 Clarity to smooth out the water areas. The thing that really made this image pop was opening up the Topaz (see sidebar for website link) ReStyle and selecting the Blue Dreams preset. The color combinations really changed a boring image into a beautiful image. I am amazed by what this plug-in can do! The Structure and Detail were increased on just the rocks and flowers using a Mask for this section inside the plug-in. I wanted the water to still look soft. Back in Photoshop a Levels Adjustment Layer was added where the Midtones tab was set to 0.82 and the Output Levels were set to 7/255. The last step was adding a Layer Style by double clicking a composite layer (CTRL+ALT+SHIFT+E) that I created on top. A Pattern Overlay was added using Photoshop’s pattern called Dark Coarse Weave set to Overlay blend mode, 65% opacity and a Scale of 128%. These settings can change depending upon the size and resolution of your image. Anyway, pretty easy to do and I love the result!…..Digital Lady Syd
From Discumbuberated to Extraordinary!

This is the same Discumberated Gerbera from the previous blog (see my Discumberated! blog). Now it has popped all the way up and looks like a delicate dancer! I love the pinks! This time a very different process was used to get this effect. I actually did 4 totally different renditions of this image so you may see it again. Very little was done in Lightroom other than the zoomed in square crop and some Basic Panel adjustments. I added four separate layers with Kim Klassen‘s youareextraordinary brush set to 1272 pixels, setting the layer opacities to 100%, 70%, 50% and 30%. By choosing the Move Tool and holding down the SHIFT key, just drag each brush down stroke down and line up under the one above. While watching Jack Davis teaching Adobe Camera Raw Optimizing, Enhancing & Retouching on Creative Live, he demonstrated one of his actions (located in Wow-Photo Enhance Actions Set -> Wow Filtered Watercolor + Linework action) that gave a really nice finished look. So I ran this action on my image, and then adjusted the resulting layer blend modes and layer opacities. A peach Solid Color Fill layer set to 22% layer opacity was added and a Curves Adjustment Layer. This is the final result – I really like the almost illustrative result. It is a lot of fun to play with Jack’s actions, layer styles, and Lightroom presets – they are all really great!…..Digital Lady Syd
Digital Lady Syd Related Blogs:
Can You Get a Painting Look With a Photoshop Action? Jack Davis Can!
Jack Davis Painting Action Really Works!
Discumbuberated!
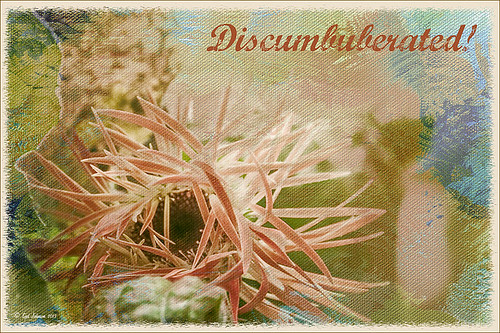
This little pink gerbera flower that is trying desperately to get herself straightened out was taken on my back porch. Very little processing on this image in Lightroom – just some cropping, basic slider adjustments, and Dave Delnea’s custom tone 002 preset. Topaz (see sidebar for website link) DeNoise 5 – the best noise reduction plug-in around – was applied (Overall at 0.19 and Shadows at 0.39). Painted Textures new October Sky texture was applied at Normal blend mode at 64% layer opacity. In a Layer Mask, the flower was gently painted black with a soft low opacity black brush. The font is Marcelle Script from DaFont. The border is one I created in my More Border Fun! blog with a cream Color Fill Layer clipped to the frame (ALT+click between the layer to clip). That was all. I love Melissa Gallo’s new texture effect on this image!…..Digital Lady Syd
Just a Spot of Color in a B&W to Pop an Image!
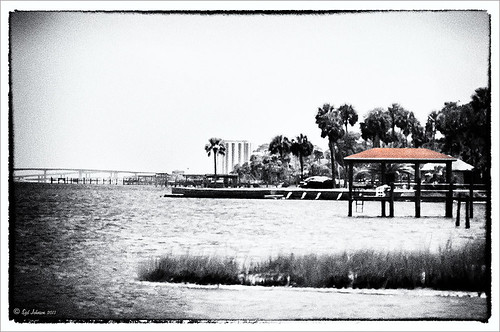
Really loved this image taken during the brightest time of day on the Intracoastal Water Way (aka Halafax River) in Ormond Beach – shooting towards Daytona Beach. In Lightroom I did just the basic slider adjustments and removed a little Noise and fringing before opening in Photoshop. Some clean up in the left corner was done to get rid of some out-of-focus greenery and a couple dots on the roof were removed. On a stamped layer (CTRL+ALT+SHIFT+E) that was converted to a Smart Object, Nik’s Silver Efex Pro 2 was opened and the Film Noire 1 preset was applied. The Color Filter was changed to Green. A Control Point was set on the Roof and the Selective Color slider was adjusted to bring back just a hint of the orange color back into the photo. Another Control point was added to the bridge and building in the background to define the lines just a little – they were pretty soft looking in the original. Once in Photoshop again, a Curves Adjustment Layer was added to give an over-exposed look to the water. The Hand Tool in the upper left of the Curves Panel was dragged up on the water in the image to get the look. That is all that was done to get this look. – I really liked how it turned out.
Daisy Poetry
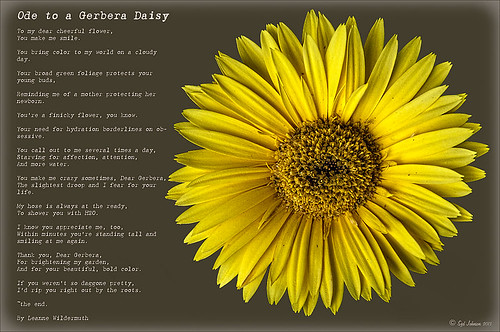
I am a big fan of Gerbera Daisies and since I had this little beauty popping up in a pot on my back porch, I decided to photograph it. (I also discovered while processing this image that my plant has bugs! Ugh!) I wanted to add a little text to it so I had to isolate the daisy from the background – used my new learned tricks from my How To Use the Color Range Command with CS4 Through CC 14.1 blog. On a duplicated background layer the Sampled Colors eyedroppers were used to sample the yellow flower and as much of the center as possible. (Localized Color Clusters checked, Fuzziness set to 19, and Range 100%.) Then back in Photoshop used the Lasso Tool – pressed the ALT key to remove the little flashing spots in the middle – pretty fast process. Since now the flower was selected and I wanted the background selected, the whole selection had to be inverted by going to Select -> Inverse. Next a Layer Mask was added to the duplicated flower layer where the selection was turned into the layer mask of. A New Layer was placed underneath this layer and filled with a nice Fall brown color. The Layer Mask of the flower was now applied to the layer by right-clicking on the Layer Mask and selecting Apply Layer Mask. Now the brown background shows up. For the text I found this cute poem by Leanne Wildermuth, a pet portrait artist photographer and web developer, that had just the right sentiment. To find this humorous poem, click on Ode to a Gerbera Daisy. Text was placed in a text bounding box created by selecting the Text Tool and dragging out a box that fit the size needed. An Inner Glow Layer Style was added for the vignetting using a Blend Mode of Normal, Opacity of 30%, White color and Size of 250; and a Stroke was set around the outside using black at 3 pixels Inside. Had total fun creating this image. Hope you enjoy it!…..Digital Lady Syd
Digital Lady Syd Related Blogs:
Pretty in Pink! with Topaz Clarity
More Clarity on Topaz Clarity
Zebra Butterfly Showing Off
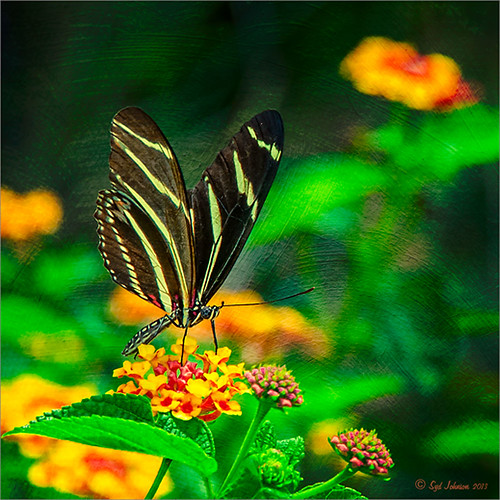
I found this beautiful Zebra Longwing Butterfly on my Lantana flowers in my front yard. She did not like having her picture taken – was very skiddish! Still got a couple nice ones of her. Apparently this is the Florida State Butterfly – who knew we had a State Butterfly? There is a very nice short video at the Florida State site showing the butterfly in action. I think my butterfly looks nicer than the ones in the video. In Lightroom a preset I created using Allen Mowery’s free preset was applied (see my Fun Photoshop Blog How to Add a Little Retro to Your Shot – 2nd paragraph has the settings used in my preset.) In Photoshop first Topaz (see sidebar for website link) Detail 3’s Overall Detail II preset was applied. On a duplicated layer Nik’s Viveza 2 was applied and 12 control points were added to make the butterfly and flower she was standing on pop forward. A little vignetting was added and a free texture from Wustenhagen Imagery Texture Green Pastel Brush was added twice, once set to Color Burn blend mode at 47% layer opacity and then Vivid Light blend mode at 17% layer opacity. This great texture really gives the painterly look to the image. He has some really nice textures for sale also. Really liked the final result!…..Digital Lady Syd

