Light on the Plant
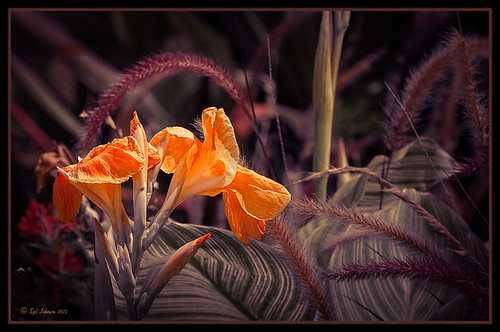
This is an image of the Canna MACtro flowers that grows in my crazy front yard – always has healthy blooms for me! It was mainly processed in Lightroom. The image in Lightroom was first turned to black and white by going to the HSL Saturation panel and setting all the colors to -100. Then the colored sliders were adjusted until I got a pleasing color balance. With an Adjustment Brush, the flowers were sharpened. I used a preset I made from David duChemin older Refining Your Vision in Adobe Photoshop Lightroom book (still a great read) that I call duChemin Classic India preset. Dave Delnea’s Backlight Horizontal Left preset was applied to light up the flowers and last free Matt Kloskowski’s Vignette (Strong) was applied. The image was now ready for Photoshop where Nik Viveza 2 was opened and control points placed on the flowers to sharpen a bit more, and on the background areas to further darken the distractions. My free SJ B&W Border Style was applied and the Inner Glow changed from white to a sampled color in the image. That was it!…..Digital Lady Syd
Digital Lady Syd Related Blogs:
How to Pop a Picture in Lightroom 5
How to Use Adobe Camera Raw (ACR) or Lightroom 4 Quickly
I Didn’t Know That! Converting Lightroom Preset to Adobe Camera Raw Preset
Who’s Watching Who?
Got inspired recently after attending my first Photography Club of Flagler County meeting. They had a wonderful guest presenter, Joe Campanellie, who is a portrait and nature and wildlife photographer. His business is called Campanellie’s Portraits of Palm Coast, Florida – check out the icon under his Home button to see some of the beautiful wildlife images he has created. His eagle images are incredible!
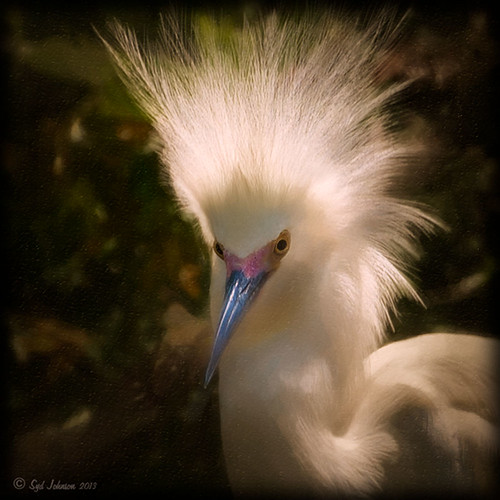
The presentation got me thinking about wildlife photography so I decided to process one of my older images from the St. Augustine Alligator Farm. (Here are a couple links from my Flickr site showing a few more of my images: Snowy Egret Chicks, Cattle Egret, and The Birds of the Rookery.) This egret above was cropped in Lightroom to get the head shot. In Photoshop I added a Curves Adjustment Layer to get rid of some shadows on his face I did not like. (See my Using Curves Adjustment Layers to Get Rid of Shadows and Highlights blog for more info on this.) Nik Viveza 2 was used to soften the background a little and sharpen his face. Then Alien Skin’s Snap Art 3 was applied to give a little different effect to this image. The Oil Paint (dry brush) preset was applied with three layers – one to sharpen the face, one for the hair, and one to darken some of the bright highlights in the background. Another Curves Adjustment Layer was added to give a warmer feel to the image. Topaz (see sidebar for website link) Detail 3’s Micro Contrast II preset was applied to just sharpen the eyes and some of the feathers. A dark Inner Glow Layer Style was added. Since the image was very small due to the large crop, the image was taken into Perfect Resize (see sidebar for website link) and set to 200%. This program does a great job increasing image size without losing quality of the image. I am now wishing I had gotten back to the Alligator Farm this year – great place to watch the birds!….Digital Lady Syd
Digital Lady Syd Related Blog:
Making An Ordinary Image Your Own
Calendar Template for 2012
Feeling Like a Walk on the Island
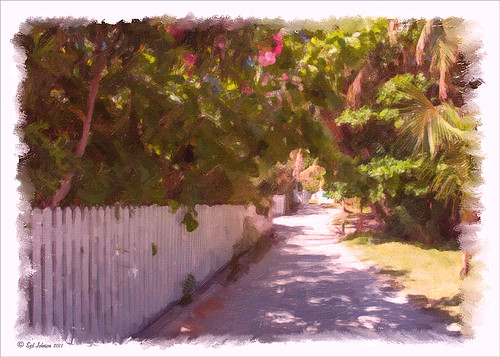
Really loved how this image turned out – this is what the Bahamas (Great Guana Cay in this case) looked like to me when just walking around on some of the more deserted areas of the islands. This image was not that great to begin with, even with adjustments in Lightroom, but by adding Alien Skin’s Snap Art 3 Photoshop plug-in, it turned into a nice painterly effect. The Factory default preset was applied – I find I like it on many of my images. Using two layers in the plug-in, the focal point at the end of the path was painted with a more photorealistic slider detail and a few items in the foreground were slightly blurred. To finish up I used my free SJ Painter Oil Frame and painted around the edges with Fay Sirkis’s Mixer Brushes (used her Palette Knife Tap n Blend brush and Signature Palette Blender brush – brushes can be downloaded from her Four Seasons painting on-line training classes on NAPP – I think her brushes are the best out there!) to smooth the framing into the image a little more realistically. That was all that I did, but I think I might print this one for my wall……Digital Lady Syd
Fly Like a Butterfly!
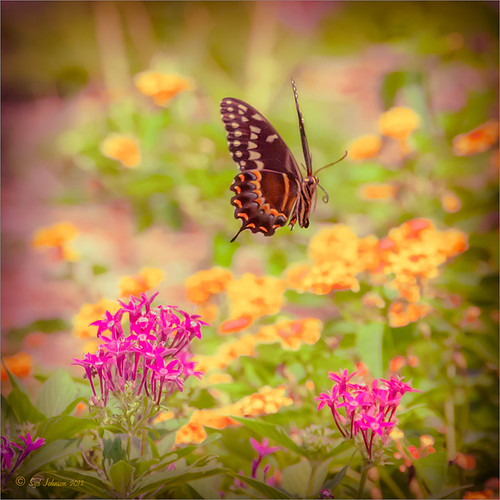
Just had to post this image of a beautiful Palamedes Swallowtail Butterfly flying mid-air in my pink penta flowers. I love the soft effect I got in this image even though the colors are so bright. So how did I get this pretty image? First I added the Retro Vintage preset I created earlier (see my Fun Photoshop How to Add a Little Retro to Your Shots Blog under Create a Lightroom Preset For a Vintage Feel) at 145% Strength by using The Fader, a Lightroom plug-in that let’s you adjust the strength of the preset from 0% through 150% – major cool to use at times. A vignette was added and some colors were adjusted in the Saturation section of the HSL panel. Noise was removed and a little overall sharpening was applied. The butterfly was sharpened more using an Adjustment Brush. In Photoshop, Nik Viveza 2 was opened and three control points were placed – one on the butterfly and one each on the pink penta flowers to bring out exactly the correct detail and color. I love this plug-in! Next a Curves Adjustment Layer was opened to lighten up the butterfly and pentas. The Layer Mask was filled with black and a soft low opacity white brush was used to paint back the butterfly and flowers to get just the right amount of contrast. That was it. Very easy and I love the way this turned out!…..Digital Lady Syd
Digital Lady Syd Related Blogs:
Great Free Plug-in for Lightroom – The Fader!
A Little Hollywood for My Butterfly Model
Butterfly Beauty!
Feeling Butterflies!
Butterfly Season is Here!
Yellow Dogface Butterfly in her Glory!
Flower with a Shadow
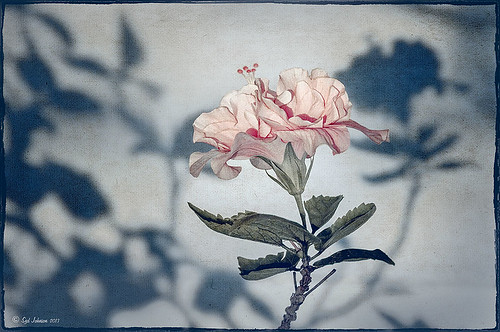
This beautiful hibiscus bloom was sitting just right to throw a shadow on a textured wall behind it. I bought some really beautiful Lightroom presets at Craft and Vision by Dave Delnea and applied his Washed Tropics Look 3 to this image. I have used it on a couple other images and really like the effect. The flower and stem were sharpened using an Adjustment Brush. Once opened in Photoshop Kim Klassen’s January Set 0801 texture was applied to add a little more texture to the image – it was set to Soft Light blend mode at 63% layer opacity. A Levels Adjustment Layer was added and the Midtone slider was set to 1.11 and the black tab moved to the edge of the histogram. The Output Levels slider was set to 19. A line grunge border was added to the edge. The image is now beige and light pink with a greenish shadow. It was taken into Topaz (see sidebar for website link) ReStyle and the Tiara Frost Preset was applied. A few changes were made to the Luminosity and Saturation of the colors and some Structure and Sharpness was added. These settings were applied and back in Photoshop the layer was set to 64% layer opacity. That is all that was done. I think the shadow looks fabulous in the background!…..Digital Lady Syd
Jack Davis Painting Action Really Works!
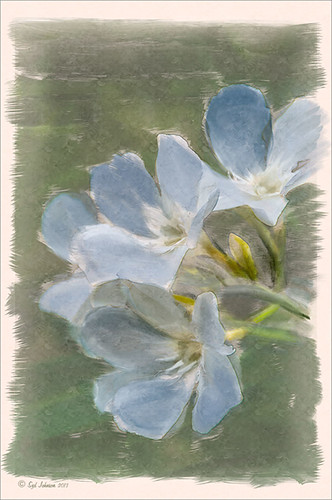
Just started playing around with Jack Davis’s Davis-Mixer Painting SetUp – BETA action and ended up with this. I thought they actually turned out pretty nice. (To download this and several other actions and brushes, go to Jack Davis Wow Facebook page – just Like his page and go to the Freebies button and select Jack’s Painting Presets.) Not totally following his workflow in the action, but with a little fiddling around with some of the colors, it turned out pretty nice. I actually left a bit of outline layer in the image (67% opacity) as I thought it enhanced the lines of the flowers a little, but I had to erase out the image border on this layer. Also a Color Fill Layer was added just above the Pattern Fill Layer at the bottom of the stack and set to a peach color and set to 30% opacity. Other than that, it was just painting using Jack’s Mixer Brushes for his download. (For info on how to do this action, check out my Can You Get a Painting Look With a Photoshop Action? Jack Davis Can! blog and scroll down to the steps for Image 2.) This seems to be much easier for me to do than using Russell Brown’s Painting Assistant. Suggest you try them both out since they are both free……Digital Lady Syd
Digital Lady Syd’s Related Blogs:
Dr. Brown’s Painting Assistant Panel for CS6 and CS5!
Soft Painterly Effect
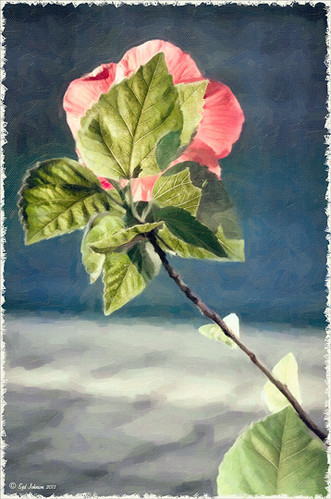
This pretty Red Chinese Hibiscus Flower was basking in the sun one morning when I decided to snap it. This was a very simple image to post-process – just used Alien Skin’s Snap Art 3 and the Factory Default – no changes. A Color Balance Adjustment Layer was added to get the color right – only the Yellow to Blue slider was adjusted in all three Tone areas. A Curves Adjustment Layer was used to adjust a little shadow tone. The Frame is one that I created following one of Dave Cross’s Kelby Training Photoshop CS5 Finishing Touches for Photographers videos. That was it! Very simple, but very pretty!…..Digital Lady Syd
Mushroom to “Mission Control”
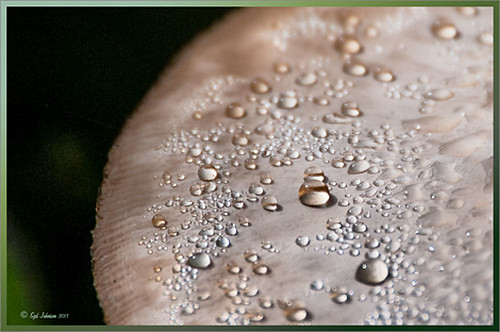
Recently a few Meadow Mushrooms grew to a large size very quickly in my yard. (Here’s is another mushroom image I took.) They actually were quite pretty, especially when the morning dew was on them. It really reminded me of a strange moon’s terrestrial surface. This image used very little processing to get this final look. In Lightroom the most important step was the crop to bring in all the interesting dew drops – the image was cropped quite drastically! The White Balance was adjusted and it was opened in Photoshop. Next Nik’s Viveza 2 was selected from the Filters list and three control points were placed to emphasize the structure of the larger drops and also to brighten up the center of the mushroom. Back in Photoshop a Curves Adjustment Layer was added on top and a couple points added to the curve to get the contrast needed. The last step involved adding a Stroke Layer Style – used the Fill Type Gradient set to an angle of -60 degrees and Photoshop’s Rainforest gradient. The Size was set to 21 pixels. That was all the processing done. Love the results! (I guess it is a good thing that I like own work – LOL)…..Digital Lady Syd


