
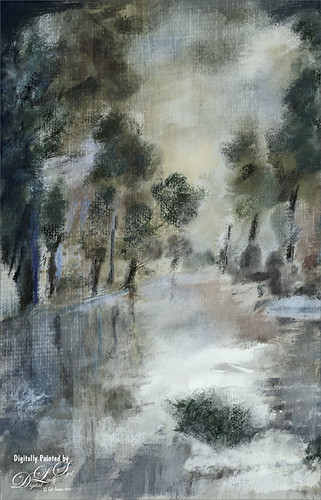
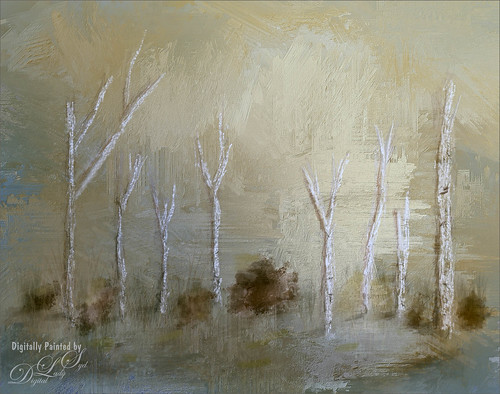
A Wintry Day
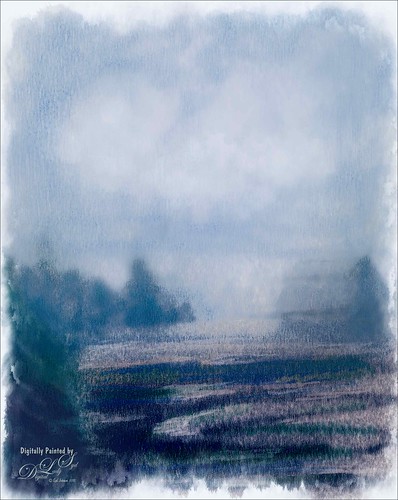
Just trying out the Watercolor category in Corel Painter. Usually use Photoshop to do the watercolor effects, but I finally got around to watching Jason Maranto’s videos on the Painter 2015 brush engine and learned how to use them. This image mainly used a Painter 2016 brush in the Watercolor category called Speckle Wash with the opacity changed for the various areas of the image. In Photoshop Topaz (see sidebar for website link) Lens Effects was opened and used the Graduated Neutral Density Filter, and Topaz ReStyle using the Tierra Frost preset. Really enjoyed doing this image!…..Digital Lady Syd
My Imaginary Landscape
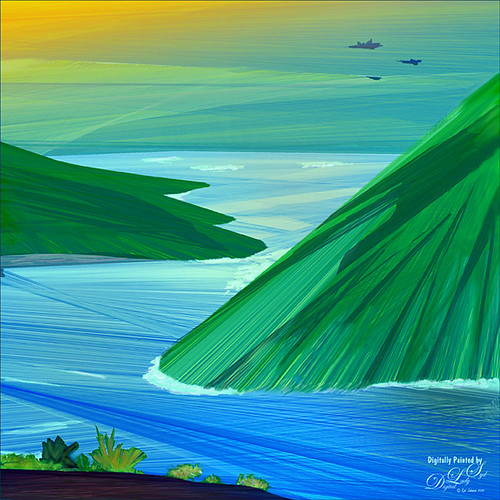
This image was my first created in the new Corel Painter 2016. This used a Spring Particle brush that Corel Master Winifred Whitfield is giving away to use with the her video called Watercolor Spring Particles. This brush can be very addictive, especially if you follow her instructions and make a few variants of your own. Most of the image was created in Painter which can put each color and stroke on different layers if you want. The surf effect was created using the Eraser Tool in Painter. In Photoshop some of the sharp edges on those painted patterned layers were cleaned up where the Painter strokes overlapped a little too much. On a stamped layer (CTRL+ALT+SHIFT+E) on top, Topaz Lens Effects was opened. A Dual Tone filter was applied using the Top Left Red Leak preset and changing a few of the sliders to get a more pronounced sunset feeling in the sky. The last step was to use Nik Viveza 2 to help guide the eye through the image. Both of these filters could have been applied in Painter. That was it. Lots of fun with this brush and the new Painter version……Digital Lady Syd
A Wintry Scene
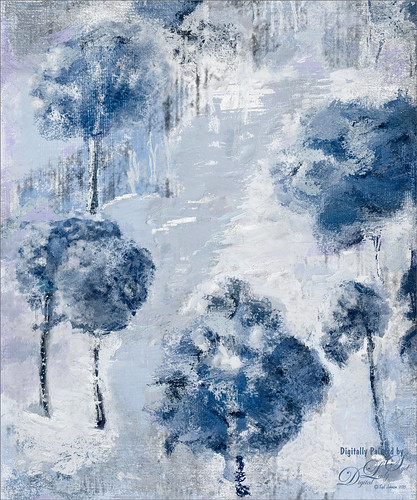
Just practicing my painting some more. Love painting these wintry scenes even though it is so hot outside. Not too much to this image other than it was first painted in Painter, then taken back into Photoshop, taken back to Painter, and ended up in Photoshop. Phew! Used several brushes in each program. Two textures, each with a Hue/Saturation Adjustments Level clipped to it, with the Saturation slider set to -100 so no color was added, only texture. Just fun to paint!…..Digital Lady Syd
Macaws Being Macaws
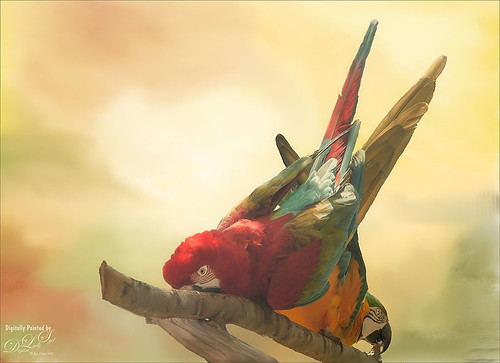
This rather unique image of these two Macaws, a Scarlet and a Blue and Yellow, was taken at the St. Augustine Alligator Farm a while ago. Not sure how I get such funny pictures of birds! I really wanted to take Topaz (see sidebar for website link) ReMask 5 through its paces and it worked really great on this image. (See my Digital Lady Syd Reviews Topaz ReMask 5 blog.) After creating a layer mask in ReMask, one of my Painter backgrounds was placed underneath the birds. A Regular brush layer and a Mixer brush layer were used to paint some of the feathers and the branch they were on. Then the texture was duplicated twice and placed above the birds. One was set to Multiply blend mode at 59% layer opacity and one to Overlay blend mode at 60% layer opacity. A stamped layer was placed on top. I felt the birds looked too bright before this was done. Therefore Topaz Lens Effect’s Fog I preset was applied (Amount 0.19, Angle 135.4, and Diffusion 0.14) to get the softer color effect, especially in the lower part of the image. That is all that was done to get this soft feel to these interesting birds…..Digital Lady Syd
First Signs of Winter
Totally enjoyed myself painting this little wintry scene. I think the recent hot weather in Florida has gotten to me! Used a very textured paper in Corel Painter 15 and mainly an Oil Brush and Blender that smeared some of the edges. In Photoshop used some of Grut’s brushes (these are a fabulous collection of brushes) to fill in where the trees did not look quite right. A texture was applied with no color (used a Hue/Saturation Adjustment Layer clipped to it and set Saturation slider to -100) to get even more texture. Last step was to add Topaz (see sidebar for website link) ReStyle Desaturated Warm III preset for the final color effect. It really is fun just to paint!…..Digital Lady Syd
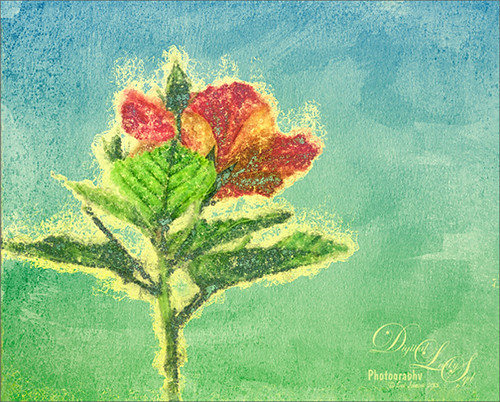
Summertime!
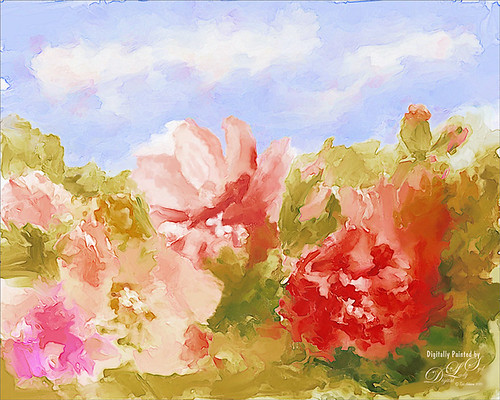
These are just some flowers I started painting in Corel Painter 2015. This used the Basic Paper with the default settings. Only an oil paint brush and a blender were used. Just a lot of fun to paint. I then brought the image into Photoshop and duplicated the background. Topaz (see sidebar for website link) Glow was opened and my SJ Mysterious II Water preset was applied. This mainly made the image more vivid. Once out of the plug-in, Grut’s O Rooster Suit brush was used in PS to smooth out uneven lines and do general clean up. Nik Viveza 2 was used to make sure the red flower was the focal point. I really enjoyed doing a little free-style painting……Digital Lady Syd
Horses Checking Me Out
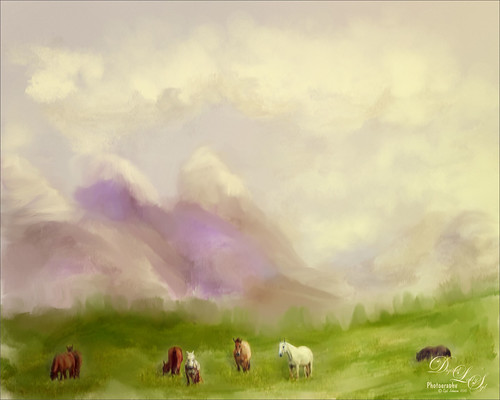
Created this image using a texture I painted in Corel Painter and a horse image from Belarus. This is basically just painting the horses into the texture by using a black layer mask on the horse image above. Then used Topaz (see sidebar for website link) Lens Effects Toy Camera filter Awesomeness I preset as a start, then applied the Reflector filter to lighten up the whole image. On a stamped layer Topaz Restyle was used and just the bottom colors were changed to darker tones. Then mainly just some clean up – love the the results……Digital Lady Syd
A Tricolored Heron That Fell in a Painting!
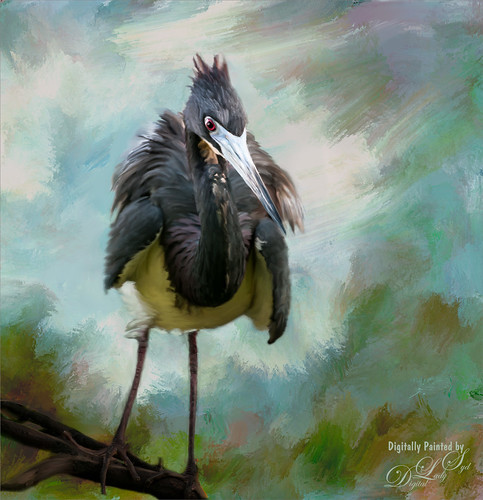
I seem to have an endless supply of these bird images from the St. Augustine Alligator Farm Rookery. It is such an incredible place to get bird images in the Spring. This is just another example of one of the magnificent birds hanging out looking for a mate. This time I actually used a layer mask to separate most of the bird from the tree limbs behind him. Since I was going to paint him, it did not have to be perfect. The bird was painted using Fay Sirkis’s (from KelbyOne) Precious Diamond Blender brush (her Mixer brushes are wonderful), then changing to it to add color when needed. This is my favorite brush for painting birds and has been used on most of my bird paintings. The texture is made up of two textures I created in Corel Painter 2015. Both textures used Quick Fix Color Brushes from Karen Sperling’s Artistry Quick Fix Video (#4 in this case) Series (check them out-and inexpensive way to learn Painter and she provides some of the best Painter brushes!), and the second also used a blender I created, and the other used Karen’s . They were placed underneath the bird and on a New Layer on top, the edges of the bird were blended into the texture. An Exposure Adjustment Layer (see my How To Do a Quick Eye Sharpening in Photoshop blog) was used to sharpen the eye. On a stamped layer on top, PS Camera Raw’s Radial Filter was used to add focus to the face and beak – painted out with the brush parts of body not to be emphasized. A Selective Color Adjustment Layer’s White Color was selected to make the white color behind the bird stand out just a little more – set Black slider to -37. That was it. I was pleased how the texture fits with the bird……Digital Lady Syd
Waiting For Spring
Just doing some practicing in Corel Painter. I do not do this enough, but the experts say that to actually be good you should paint every day. This image used three of the original Corel Masters brushes – Melissa Gallo, Karen Sperling and Marilyn Sholen brushes. If you get any of their brushes, you cannot go wrong. In Photoshop on a New Layer the brush I created in my Fun Photoshop Blog How To Use Photoshop’s Brush Texture Section for Painting Clean-up was used to clean up messy areas. (I really do use the techniques I present. HaHa!) Painted Textures Mist on the Lake texture was placed on top and set to Multiply blend mode. Then because I could, Topaz (see sidebar for website link) ReStyle was opened and a different color palette was selected. Sorry I do not have the settings but I think it involved the Peppermint Green preset. A Curves Adjustment Layer was added on top to add back contrast. Finally a little Nik Viveza 2 magic. That was it…..Digital Lady Syd
Painting The Lost Continent
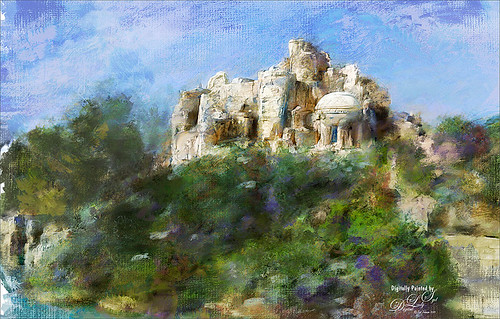
This painted image was taken at Universal Studios of The Lost Continent. It looks like it is a really cool place, which is was, but it was all fake! The building is where The Eighth Voyage of Sinbad Stunt Show is presented. Just thought everyone would like to see something other than birds!
Well, not much was done in Lightroom, just added some contrast. Took image into Corel Painter. Three sources were used to draw color into the image. The new Particle Spring Worm Hole Cloner brush was used to create a very interesting flora effect along with several other brushes. In Photoshop more clean up was done with Photoshop’s Round Blunt Mixer Brush with a texture added. Two copies of Painted Texture’s October Paint texture were added and set to Vivid Light at 19% layer opacity and Color Dodge at 37% layer opacity. Last step, Nik Viveza 2 of course. That was it!…..Digital Lady Syd
Digital Lady Syd Related Blogs:
Texturizing at The Lost Continent
Where Am I?
Thinking of Pink Tulips

This is an abstract I painted from some beautiful tulips that was taken with my phone. It was first painted in Corel Painter using just some very basic strokes. A Karen Sperling texture brush from back when Painter 11 was popular was used. Color were just block in. Then the image was taken into Photoshop and on a New Layer a sketch brush was used to define the form in a few places. A Curves Adjustment Layer was used to add a little contrast. A stamped layer was created and turned into a Smart Object. Nik Viveza 2 was opened and the pink flower in the middle was accentuated to further emphasize the focal point. The last step involved adding a New Layer on top and in white, add a few spatters using Kyle’s Real Watercolor-Spatter Mixed and set to a low layer opacity to add just a little texture in certain places. Very simple to do…..Digital Lady Syd
Beautiful Spring Flowers!

Just a little digital fun here with a phone image taken at the local Lowes Home and Garden Center. I recently purchased an inexpensive introductory Corel Painter video on Painting Portraits from Corel Master Karen Sperling. It comes with some of her great brushes – found one I really love! I had to reduce the size of the brushes since the image size was reduced to make Painter run smoother for me. I also added Topaz (see sidebar for website link) ReStyle’s Zambezi Zest preset as a source image before starting as I liked the color palette it gave me. Overall I was very pleased with her video and brushes, and it was fun to try out a new technique. This is a very easy way to get started learning Painter. Also I added afterwards in Photoshop the two Curve Adjustment Layers technique for dodging and burning that I blogged on recently. Loved the results!…..Digital Lady Syd
Digital Lady Syd Related Blogs:
How To Use Curves Adjustment Layers To Dodge and Burn an Image
A Wintry Scene
This is just a another image I created using mainly Aaron Blaise’s Foliage and Water brushes in Photoshop. In Painter some of the snow effects were created using Gel’s 2009 Holiday brushes and Fay Sirkis’ blender brushes. The Impasto sky was created using on one of Melissa Gallo’s brushes. In Photoshop three snow layers were added and Shadowhouse Creations Assorted Brush set tree brush 4 for background effect. As you can see, this is made up of a lot of different brushes and a little of my own painting. Not sure why I went wintry today, but it was a lot of fun to do…..Digital Lady Syd.
Trying out Very Wet Watercolor Brushes in Painter

This is just a short quick blog to explain the above image. I did a Bob Ross type image using Skip Allen‘s wonderful Working with Very Wet Watercolor Variant Videos as a guide. I had never used watercolor brushes that run like traditional paints – they actually make your computer really “chug-a-long,” but Skip explains how to get around those hurdles. The above pretty much followed his videos, except I switched over to Photoshop to add the textures. I am much more comfortable using PS for this part of the process. The textures used were Frenchkiss Collections (see sidebar for website link) Artiste Autumn Fauve set to Hard Light at 65% layer opacity for the adding in the nice yellow and brown tones, and Painted Textures Olive Canvas (from one of Melissa’s workshops) set to Hard Light at 100% layer opacity which is basically a pretty soft plain greenish texture. A Curves Adjustment Layer was used to add some contrast back into the image. On a New Layer, Kyle’s Real Watercolor Big Rough Textured mod brush was used to darken down the left side of the mountain a little more. It was set to Soft Light blend mode. Just wanted you to see that you can add in a few more strokes in Photoshop to fill out areas that did not stroke correctly in Painter. That was it. Apparently people add chops to this, but I do not know how to do this yet. I would recommend you check out Skip’s tutorials and free brushes if you get a chance…..Digital Lady Syd
A Little Cherry Tree

Have not painted in a while so decided to give it a go. I wanted to paint a Cherry Tree since I lived in the Washington, DC area for many years and miss seeing them this time of year. The original image was created in Corel Painter 2015 on just the Canvas and using 9 different brushes on a Plaster Paper. This image was brought into Photoshop where a Clean Up layer was created. Three other layers using some of Aaron Blaise Foliage Brushes were added to soften some of the sharp edges mainly around the water and on the plants. A Motion Blur set to 4 was used to soften the graphic look os his brushes. Nik Viveza 2 was used to reinforce the focal area in the tree and a Level Adjustment Layer was added to make sure the contrast was correct. That was it! It was a lot of fun to get back to painting, but I still like to go between the programs……Digital Lady Syd
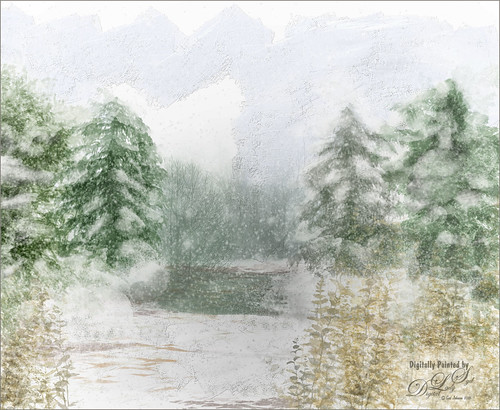
Wintry Scene

So how do you create this tree effect? About all I can say is by following Painter for Photographers videos from Melissa Gallo, a Corel Painter master who really knows how to paint. She supplies the brushes and and papers to get this result. It was a lot of fun to create this little image from scratch……Digital Lady Syd
Sunny Desert Day

Just went back and listenedd to Karen Bonaker’s wonderful Corel Webinar called Corel Painter Mixed Media Painting and thought I’d try some of her tips. Many of the steps and brushes used in her examples were used along with several brushes created by following Jason Moranto’s Brush Engine Essentials videos offered at Karen’s Digital Art Academy – this is a great way to learn Painter! Topaz (see sidebar for website link) ReStyle’s Desert Dust preset set to Soft Light blend mode was applied and set to 50% layer opacity. Nik Viveza 2 to draw out the focal point a little bit. Need to try this one if you like a watercolor look. Creating this image was totally fun!…..Digital Lady Syd
Adding Some Background Texture
Just used my red hibiscus object image again to try out some texture effects with the background. I really liked the results. The flower was brought in and it was duplicated. Topaz (see sidebar for website link) ReStyle’s Cream and Plum preset was applied to the duplicated layer and set to Darken blend mode at 66% layer opacity. A texture that was made in Corel Painter using the Coarse Smear Blender Jitter brush (a FB friend used this brush quite effectively on an image) in a brownish beige color was added underneath the flower. It was also duplicated, Free Transformed (CTRL+T) where it was reduced and flipped horizontally, and lined up under the flower. A Levels Adjustment Layer and a Hue/Saturation Adjustment Layer were clipped (ALT+click between the layers to clip) to the top texture layer to get the pinkish color. The last texture added just below the flower was made in Corel Painter using the Gravity Bristle Particle Brush (learned how to do this at the end of Commercial Packaging Illustration with Michael Bast Corel video where he shows the technique – I really liked it! Saved it as a PSD to open in Photoshop as a texture.) It was set to Multiply blend mode and an olive green Solid Color Adjustment Layer was clipped to this texture to make it a soft olive green. A stamped version was created on top and Blend If sliders applied before some clean up work was done. A final Levels Adjustment Layer was used to get the effect. Loved creating the textures for this!…..Digital Lady Syd
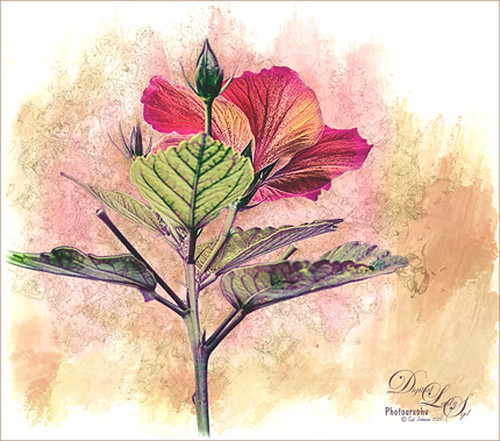
A Particle Brush Flower
This beautiful Chinese Hibiscus bloom was painted in Corel Painter using one of their new particle brushes and following the short video called Painter 2015 Particle Brush Painting Featuring Karen Bonaker. The image started with auto-painting using the Oils category Particle Spring Oil Mop brush variant. So much fun. Then brought it back into Photoshop to apply the textures, although it could have been done the same way the video showed in Painter. The flower was selected by going to Select -> Color Range and choosing white. Then added a layer mask to the painted canvas layer so the flower is white and the background is black in the mask. Since I wanted the edging to be yellow around the flower, the Layer Style was opened and the B Channel was unchecked. Also the Blend If This Layer black tab was split (ALT+drag to split tab) and set to 133/158. Two textures from French Kiss (see sidebar for website link) were placed underneath: Colorwash Juin set to Normal at 100% Layer Opacity and Solstice Well Spring set to Multiply at 100% layer opacity. The Layer Style was opened up for the last texture and the Blend If This Layer white tab was split and set to 221/255 and Underlying White tab split to 195/226. The original Flower layer was placed on top with a black layer mask applied. Just the leaf veins in the front leaf and a few other details were lightly painted back in with white in the mask. A Curves Adjustment Layer was added to bring back some contrast. Last step was using Nik Viveza 2 to really add some focus to the center leaf. I really love how the particle brush created this rather interesting effect around the flower……Digital Lady Syd
Digital Lady Syd Related Blogs:
Corel Painter’s Auto-Painting Results – Not Bad!
Merry Christmas from Digital Lady Syd

Happy Holidays to all my blog buddies! I so enjoy the people I have made friends with on the Internet and through blogging. I hope everyone is having a great time and is totally enjoying this time of year.
Just a few for those who wonder – how did I make this card? Well, this all started in Photoshop where I began with the cool Ink 3 png file that is in the Christmas Poster Freebies from Design Cuts (by Vintage Design Company). It was free transformed and flipped. A Solid Color Fill Layer using a brownish-beige color was clipped (ALT+click between the layers to clip) to the Ink 3 layer. The text was added. Then this file was taken into Corel Painter where the wonderful Karen Bonaker‘s Christmas brushes were used. The deer were added and the trees were added on separate layers. Then the file was brought back into Photoshop where a layer mask on the text layer was used to make the deer look like they are walking through the text. An Inner Shadow Layer Style was added to the tree layer (Distance 17, Choke 0, Size 17). On the deer layer a Stroke set to 5 pixels, inside, normal blend mode, and a light beige color was added. The Text used an Outer Glow set to the default yellow, but Size 17. The last step was my free Snow1-Overlay set to 43% layer opacity. Basically that was it. I so enjoy making cards!…..Digital Lady Syd
Season’s Greetings!
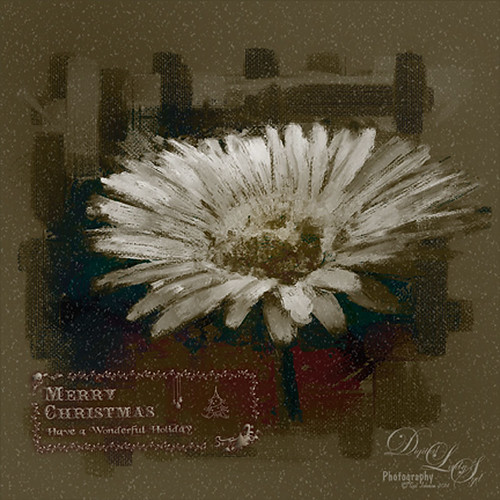
Really enjoying creating holiday items this year. This flower was painted in Corel Painter. Then brought into Photoshop where Painted Textures Winter Storm texture was added and set to Saturation blend mode. I am not sure I have ever used this one before, but by setting the Blend If Underlying Layer split black tab to 48/114 (ALT+click on tab and drag), some of the color came back – the blues and oranges mainly. A Selective Color Adjustment Layer was added. Next Nik Viveza 2 was used to pop the center where my focal point and reduce the background which pulls the eye a lot. Some clean up was done and my free Snow1-Overlay was applied and set to 14% layer opacity. Next my Merry Christmas PNG Overlay-01 (in same download link as above) was added. A Pattern Fill Adjustment Layer was clipped to the PNG layer (ALT+click between the layers to clip) and set to a beige colored pattern. Then in the layer style of the PNG layer, Bevel & Emboss effect was checked; an Inner Shadow was set to Blend Mode Normal and a deep gold color, and an Outer Glow set to Blend Mode Normal, Opacity 63%, black color, Spread 4 and Size 21 was set. I had to fiddle around with these settings to get a look I liked. But that was it. Have a Happy Holiday Season!…..Digital Lady Syd
Digital Lady Syd’s Rule No. 12: Try a New Tutorial and Experiment
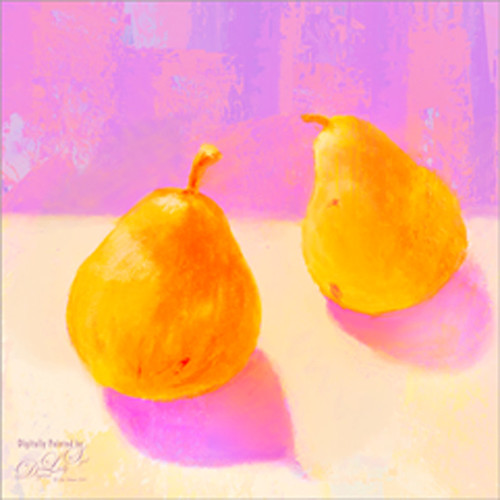
I have not done a Digital Lady Syd Rules (okay it s not Photoshop but the concept fits when doing Photoshop also) in a while. This image is just of some pears I sketched and painted in Corel Painter – I was informed that this is something first graders do but it was fun to relearn how to draw pears. I followed a tutorial posted at Peachpit Press by Corel Master Cher Threinen-Pendarvis called Blending and Feathering with Pastels in Painter-2015 – and once again I feel a bit like I was doing a Bob Ross painting. On the other hand, I learned a couple things while doing her tutorial: One is that I can sketch a little bit, and two is that I really like pastel brushes! So this was definitely worth my time to try. I finished up by using one of Melissa Gallo’s beautiful textures called August Copper, and I could not have done this tutorial justice if I had not taken her workshop and studio course on Painter. This was so much fun and I got a couple new brushes to play with at the same time!…..Digital Lady Syd
Hanging With the Gondolas!
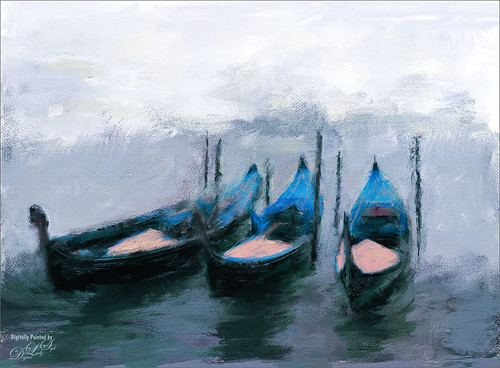
Not sure where I got this stock photo image, but thought I would use this one while learning to paint with Corel Painter and Painted Textures wonderful videos. I can see it takes a lot of practice to get good at this. Not too much to this one – just painted on the Canvas and used the Clone Source Panel to do the underpainting. Used several of Melissa’s different brushes and finished up by applying Topaz (see sidebar for website link) ReStyle. The Cold Frosty Day preset was used. Back in Photoshop her Impasto Texture 2 texture was applied and set to Overlay blend mode at 68% layer opacity. That was about it. I am really getting into the beautiful paint effects Painter has. Until I get creative again…..Digital Lady Syd
Now Just How Do These Shoes Lace Up?

I found this image called Ballerina by Equador on DeviantArt and thought I would practice painting in Corel Painter using it. The original image is very beautiful so it is hard to top it. Just followed several of the videos from Melissa Gallo’s Painted Texture’s Painter for Photographers Workshop. In Photoshop applied her Garden Canvas texture set to Overlay blend mode at 74% layer opacity. Since I did not want the actual texture on the painting, a Gaussian Blur was applied (as a Smart Object) to the texture and set to Radius of 6.1 – just enough to keep the texture color tones but blur the texture effect. Since it was a Smart Object, the amount could be adjusted to just the right amount after changing the blend mode. That is all that was done. I am loving this type of painting!…..Digital Lady Syd


